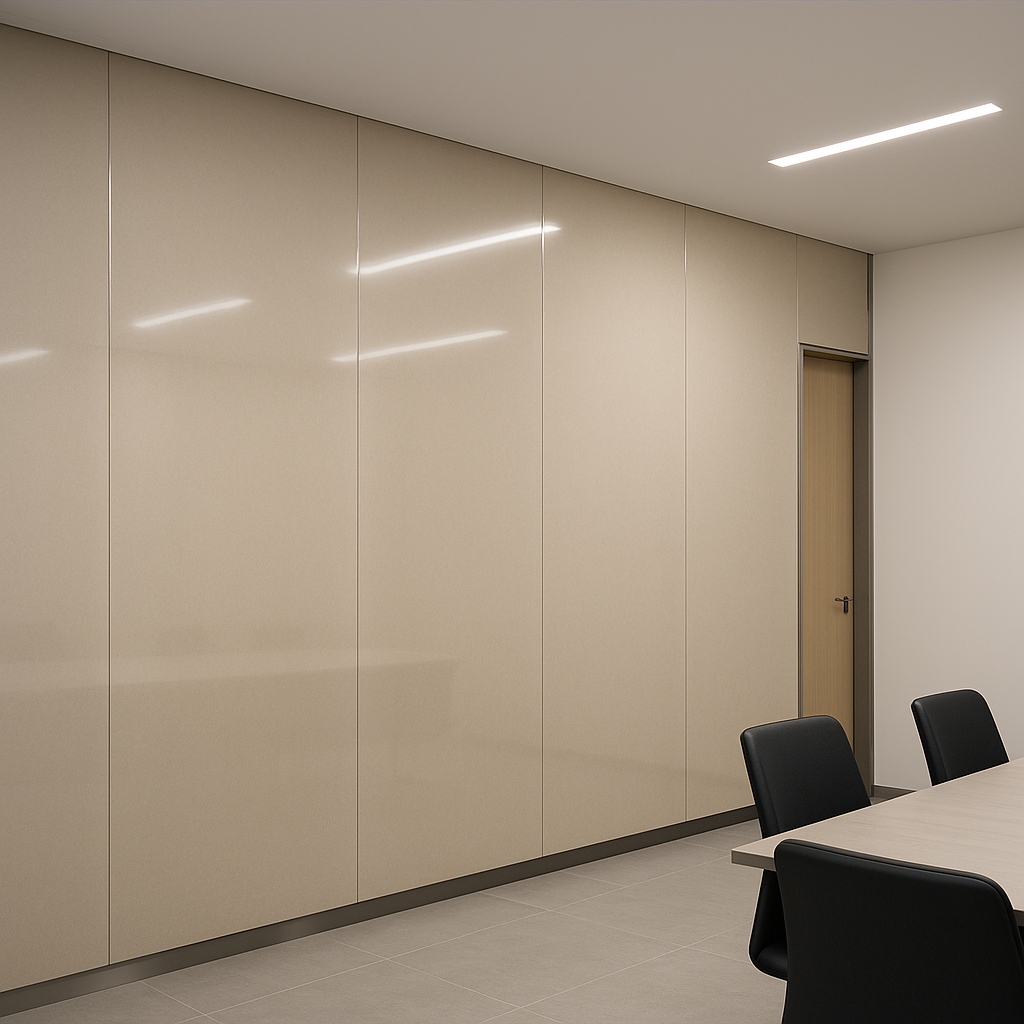
Installation Methods for 6 mm Porcelain Wall Panels in Offices & Lobbies
Outline
- Scope and performance targets
- Substrate readiness and tolerances
- Method 1: Wet-set adhesive installation (interior walls)
- Method 2: Concealed mechanical fixing (dry-hang)
- Vertical-only jointing and stainless L-trim details
- QA & handover: inspections, cleaning, O&M notes
- Quick spec (copy-ready)
Scope and Performance Targets
This guide covers interior office and lobby installations of 6 mm thin porcelain wall panels. Goals:
- Floor-to-ceiling modules with vertical-only 3–4 mm joints (no horizontal joints).
- Mirror-gloss finish (default) with uniform reflections under 4000 K lighting.
- A1 non-combustible porcelain surface, low-VOC assembly, and a clean, monolithic read.
Substrate Readiness and Tolerances
A perfect finish begins with a perfect base.
- Acceptable substrates: gypsum fiberboard, cement board, or plumb masonry.
- Flatness tolerance: ±2 mm over a 2 m straightedge; correct bows and bumps before setting.
- Deflection control: L/360 or better for partition systems receiving full-height panels.
- Moisture & dust: surfaces must be dry, sound, and dust-free; prime per adhesive manufacturer if required.
- Layout: strike a datum line so 1200 mm modules align to door frames and lift portals.

Method 1 — Wet-Set Adhesive (Interior)
Use when: the substrate is plumb and accessible, and you want maximum visual continuity without visible clips.
Materials & tools
- High-performance deformable adhesive, C2TES2-class equivalent (thin-bed).
- Back-buttering trowels, 10–12 mm notches; suction cups/vacuum lifter; leveling clips as required.
- Non-sanded color-stable grout for 3–4 mm vertical joints; neutral cure silicone for perimeters.
- 304 stainless L-trim for outside corners and terminals.
Steps
- Dry-fit & mark: center the 1200 mm grid on the reception wall; pre-cut trims.
- Adhesive spread: comb adhesive vertically; back-butter panel to ensure near 100% coverage.
- Place panel: lift with vacuum lifter; offer at slight angle; align to datum; beat in to collapse ridges.
- Joint control: insert 3–4 mm spacers; verify verticality with laser; maintain constant reveal.
- Corners: set stainless L-trim first; stop panels 2–3 mm off the inner leg; seal after grouting.
- Grouting: when adhesive cures, grout only vertical joints; clean residue before it hazes.
- Perimeter movement: silicone at ceilings, floors, and abutments (color-matched).
Cure & protection
- Protect from traffic and impact until initial set (per adhesive data sheet).
- For mirror-gloss surfaces, use microfiber and neutral detergent only—no abrasive pads.
Advantages
- Fast, light, and economical.
- Delivers the cleanest monolithic look in receptions and lift lobbies.


Method 2 — Concealed Mechanical Fixing (Dry-Hang)
Use when: the base wall is irregular, replacement access is important, or code requires positive anchorage.
System overview
- Carrier framework: vertical rails on adjustable brackets to re-plane the wall.
- Anchorage: kerf/undercut anchors engaging the 6 mm porcelain at approved edge zones.
- Panel mapping: maintain vertical 3–4 mm joints and 1200 mm module.
Steps
- Survey & frame: fix brackets at designed offsets; true the rails to achieve a single plane.
- Panel prep: cut kerfs/undercuts per system; deburr edges; pre-fit stainless L-trim at corners.
- Hang & align: set from a fixed datum; shim hardware to hold panels perfectly plumb.
- Jointing & perimeter: maintain 3–4 mm reveals; install compressible backer + sealant at perimeters.
- Inspection: confirm pull-out values/anchor torque where required by spec.
Advantages
- Replaceable panels and excellent tolerance control; useful on high-impact walls.
- Less dependent on base-wall flatness; minimal wet trades for night-shift work.

Vertical-Only Joints and Stainless L-Trim
- Joint width: 3–4 mm for a minimalist rhythm; wider joints break the monolithic read.
- Color: match grout to panel tone or use dark-metal reveals for a sharper cadence.
- Corners: 304 stainless L-trim protects edges in trolley and luggage zones; keep a 2–3 mm shadow gap to the panel edge.
- No horizontal joints: for floor-to-ceiling continuity and easier cleaning.
QA & Handover
- Lighting check at 4000 K: inspect reflections along the joint lines; correct any lippage or telegraphing.
- Flatness & module: laser-check that the joint grid stays linear across the elevation.
- Cleaning: microfiber + neutral detergent; remove silicone smears; no waxes or sealers.
- O&M pack: include adhesive data sheets, joint colors, trim profiles, and replacement panel map for facilities.
Quick Spec (Copy-Ready)
- Panels: 6 mm vitrified porcelain; mirror-gloss finish; water absorption typically ≤0.5%.
- Format: floor-to-ceiling modules at 1200 mm width; vertical joints 3–4 mm; no horizontal joints.
- Installation (interior): wet-set with C2TES2 adhesive; or concealed mechanical fixing on carrier rails.
- Edges: 304 stainless L-trim at externals and terminations.
- Lighting: 4000 K linear downlights/coves aligned with joints.
- Cleaning: pH-neutral detergent; no abrasive pads, no waxing.

Office lobby test wall showing floor-to-ceiling 6 mm porcelain panels set by wet-set adhesive with 3–4 mm